

Currently Reading:
With the unexpected snow on April 21st and Alexandra Day’s birthday tomorrow, we decided it was a sign to re-read one of our favorite winter picturebooks Carl’s Snowy Afternoon by Alexandra Day. The book is mostly wordless and follows the adventures of Carl and Baby while they sneak out to play in the snow. From pulling a sled to building a snowman, there is no better friend for a snowy adventure than Carl. Day’s detailed illustrations ensure that readers always find something new on the pages, no matter how many times they’ve read the book.
Craft: 3D Snowflakes
For this craft, you will need scissors, a glue stick, a ruler, and two or three different colors of paper.

Step One:
Using your ruler, measure out the size of your first square. If you want larger snowflakes, then measure out a 5-inch square, for smaller snowflakes, I would suggest 3 1/2 inches.

Step Two:
Cut out your squares. You will need six squares total of your paper. Originally, I was planning to use three colors in my snowflake, but then decided just to use the blue and grey paper and not the white.

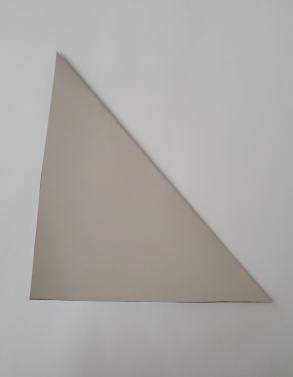
Step Three:
Fold the square in half so that it makes a triangle.
Step Four:
Fold the triangle in half. If your edges are not well-creased, take the flat edge of your scissors and run it along the crease to make it more crisp.

Step Five:
Cutting along the short folded edge, cut three slits almost to the top of the other edge. Be careful not to get too close to the top, or else your paper will tear.

Step Six:
Carefully unfold the triangles back into a square.

Step Seven:
Starting in the center, glue the tips of the cut pieces together. Make sure you alternate which side you glue them on, you will want to turn the snowflake over every other time so that the points are not all in the same direction.


Repeat these steps with all six of your squares!
Step Eight:
Glue all the pieces together in the center, alternating colors.

I also added a little bell in the center as a focal point. If you have a hole punch, you can add a bit of yarn to hang these up!